.png?width=150&height=60&name=2026%20LSC%20Logo%20(2).png)
Back Pain
If you’ve been told you have a slipped disc, it’s easy to feel like your only option is to wait for the pain to go away. But you can—and should—take a proactive role in your recovery. The key is knowing that not all movement is helpful. While high-impact activities are off the table, a targeted routine of gentle slipped disc exercises can make a world of difference. The right slip disc exercise helps decompress your spine, while specific stretches for a bulging disc improve blood flow and fortify your core. This guide shows you how to move safely and effectively to manage your symptoms.
The term “slipped disc” can be a little misleading because your spinal discs don’t actually slip out of place. A more accurate term is a herniated or bulging disc. Think of the discs between your vertebrae as tiny jelly donuts. They have a tough, rubbery exterior and a soft, gel-like center. These discs act as crucial cushions, absorbing shock from daily activities like walking and running, and allowing your spine to bend and move freely.
A herniated disc happens when a tear in that tough outer layer allows some of the soft inner gel to push its way out. This bulge can happen anywhere along the spine, but it’s most common in the lower back (lumbar spine) or the neck (cervical spine), as these areas are the most mobile. It’s often the result of gradual, age-related wear and tear, a process called disc degeneration. However, it can also be caused by a sudden strain, like lifting something heavy with poor form or a traumatic injury. When this disc material pushes outside of its normal space, it can create problems for the surrounding structures, especially the sensitive nerves that run along your spinal column. At Lazar Spinal Care, we see many patients with herniated discs and help them find relief by addressing the underlying structural issues that contribute to the problem.
If you’re dealing with back pain from a herniated disc, it can feel isolating, but you are far from alone. Back pain is one of the most common health complaints worldwide. In fact, low back pain affected a staggering 619 million people globally in 2020, and that number is expected to climb to over 840 million by 2050, making it a growing public health concern. Here in the United States, recent data shows that about one in four adults lives with chronic pain, with back issues being a primary cause. This widespread issue highlights just how important it is to understand the root cause of your pain—like a herniated disc—and find effective ways to manage it. Taking proactive steps isn't just about finding temporary relief; it's about reclaiming your quality of life from a condition that affects millions.
The pain from a herniated disc doesn’t come from the disc itself. It comes from the pressure the bulging material puts on the nearby spinal nerves. Your spinal canal is a very crowded neighborhood with little extra room. When a piece of the disc pushes out, it can press on, pinch, or irritate a nerve root.
This nerve compression is what triggers the intense pain, numbness, and weakness you might feel. If the herniated disc is in your lower back, for example, it can press on the sciatic nerve. This causes the sharp, shooting pain known as sciatica, which can travel from your buttock all the way down your leg. The pain is your body’s alarm system, signaling that a nerve is in trouble.
How do you know if you’re dealing with a herniated disc versus a simple backache? The symptoms are usually quite distinct. While a muscle strain often feels like a dull, localized ache, the pain from a herniated disc is typically sharp, burning, and radiating. It follows the path of the affected nerve.
Here are a few common signs to watch for:
If these symptoms sound familiar, it’s important to get an accurate diagnosis. Understanding the root cause of your pain is the first step toward finding effective relief, and our team is here to help you do just that when you become a new patient.
When you’re hit with the intense pain of a herniated disc, your first instinct might be to lie perfectly still. While rest is important, gentle movement is a key part of your initial recovery. The right kind of motion helps ease pain, takes pressure off your spine, and encourages healing blood flow to the injured area. The golden rule is to listen to your body. Movement should feel supportive, not sharp or painful. If any stretch or exercise increases your pain or causes more numbness or tingling down your leg, stop immediately. Your goal is to gently coax your body toward recovery, not force it.
A consistent, safe exercise routine is a crucial part of your healing process, but it's often only one piece of the puzzle. For lasting relief, it’s vital to pair your at-home efforts with professional care that addresses the underlying structural issues. At Lazar Spinal Care, we use advanced diagnostics to pinpoint the root cause of your disc issue. This allows us to create a precise care plan with gentle techniques that correct the problem, not just mask symptoms. Combining your careful movements with our expert chiropractic care creates the best environment for a full recovery.
When you’re dealing with the sharp, radiating pain of a slipped disc, your first instinct might be to stay as still as possible. While a short period of rest is helpful, gentle movement is actually one of the most effective ways to find relief and support your body’s healing process. The right exercises can make a significant difference, not just for managing pain now, but for building a stronger, more resilient back for the future. Here’s how targeted movement can help.
A slipped disc is often under a lot of pressure from the vertebrae above and below it, which is a major source of pain. Exercise helps by strengthening the muscles that support your spine. Think of these muscles as a natural brace. When they’re strong, they take on more of the load, which eases the direct pressure on your spinal discs. This can lead to significant pain relief, especially for radiating symptoms like sciatica. By building up this support system, you create a healthier environment for the disc to heal and reduce the constant strain that causes discomfort.
Your core isn't just about your abs; it includes the deep muscles in your abdomen, back, and pelvis that wrap around your spine like a protective corset. When these muscles are weak, your spine has to work harder to stay stable, increasing the risk of injury. Gentle exercises specifically designed for a herniated disc help fortify this muscular support system. A stronger core and back provide a solid foundation for your spine, improving your posture and reducing the daily stress placed on your discs. This stability is fundamental to both your recovery and your ability to move with confidence again.
Pain and inflammation from a slipped disc can cause surrounding muscles to tighten up, leading to stiffness and a limited range of motion. Gentle stretching and mobility exercises are key to counteracting this. Movement increases blood flow to the injured area, which is essential for healing. Good circulation delivers oxygen and vital nutrients to the damaged tissues while flushing out inflammatory byproducts. Over time, this helps restore flexibility in your spine and hips, making everyday movements like bending over or walking feel easier and less painful. The goal is to regain fluid motion without putting stress on the disc.
The benefits of exercise go beyond immediate relief. By consistently performing safe movements, you’re actively participating in your body's healing process and making it more resilient against future problems. Strong, flexible muscles provide better protection for your spine during daily activities, from lifting groceries to sitting at a desk. This proactive approach is one of the best ways to manage a herniated disc and reduce the likelihood of it happening again. Building these healthy habits creates a foundation for long-term wellness, helping you get back to your life with less worry about re-injury.
When you start looking into exercises for a slipped disc, you'll quickly find there isn't just one single approach. Different philosophies exist, each with its own focus. Some methods prioritize strengthening the deep core muscles to create a stable base for your spine. Others, like the McKenzie Method, concentrate on specific repeated movements designed to reduce the disc bulge and centralize your pain. The best approach for you depends on the specifics of your injury and your body. Understanding these different strategies can help you have a more informed conversation with your healthcare provider about creating a plan that truly addresses the root of your pain.
The McKenzie Method, also known as Mechanical Diagnosis and Therapy (MDT), is a popular approach that empowers you to take control of your symptoms. Developed by physical therapist Robin McKenzie, its primary goal is to "centralize" your pain. This means moving the pain from your leg or arm back toward your spine, which is a sign that the pressure on the nerve is decreasing. The method uses a series of specific, repeated movements—often gentle backbends or extensions—to help guide the displaced disc material back into its proper place. This active approach not only provides relief but also teaches you how to manage your symptoms and correct your posture to prevent future flare-ups. It’s a way of learning your body’s preferred movements for healing, which aligns with the goal of finding targeted care that addresses your specific condition.
When you’re dealing with the pain of a slipped disc, the thought of exercise might seem daunting. But gentle, targeted movements are one of the best things you can do for your recovery. The right exercises can help take pressure off your spinal nerves, strengthen the muscles that support your spine, and improve your flexibility, all of which contribute to pain relief and healing.
Think of these exercises as a way to gently reintroduce movement and build a foundation of strength. The key is to move slowly and intentionally, paying close attention to how your body feels. If any movement causes sharp pain or makes your symptoms worse, it’s important to stop. These seven exercises are a great starting point for finding relief and getting back to feeling like yourself. At Lazar Spinal Care, we believe in empowering you with the tools you need for recovery, and that includes understanding how to care for your spine at home.
The pelvic tilt is a subtle but powerful exercise. It’s fantastic for waking up and strengthening your deep core muscles, which act like a natural corset to support and stabilize your lower back. By gently moving your pelvis, you can also help relieve pressure on the affected disc.
To perform a pelvic tilt, lie on your back with your knees bent and your feet flat on the floor, about hip-width apart. Keep your arms relaxed by your sides. Take a breath in, and as you exhale, gently tighten your stomach muscles and press your lower back flat against the floor. You should feel your hips and pelvis rock back slightly. Hold this position for a few seconds while breathing normally, then relax. Aim for 10 to 15 repetitions.
This classic stretch is a wonderful way to gently release tension in your lower back and improve flexibility in your hips. For anyone with a slipped disc, this can help reduce the compression that causes pain and discomfort. It’s a simple move that provides a lot of relief.
Start by lying on your back with your knees bent and feet flat on the floor. Gently bring one knee toward your chest, using your hands to hold it behind the knee. Pull it in until you feel a comfortable stretch in your lower back and hip. It’s important not to force it. Hold the stretch for about 20 to 30 seconds, making sure to breathe deeply. Then, slowly lower your leg back to the starting position and repeat with the other leg. Do this 3 to 5 times on each side.
The Back Flexion Stretch is a fantastic way to gently decompress your entire spine and ease tension in your mid and lower back. To perform this stretch, lie on your back and pull both knees toward your chest, wrapping your hands around them for a gentle hug. As you hold your knees, slowly lift your head and tuck your chin, bringing your forehead toward your knees until you feel a comfortable, lengthening stretch. Hold this position for 15 to 30 seconds, remembering to breathe deeply and relax into the movement. This action helps create space between your vertebrae, which can relieve pressure on an irritated nerve. As experts note, gentle mobility exercises are key for counteracting the stiffness that often comes with a herniated disc, helping you support your body's natural healing process.
The cat-cow stretch is a gentle, dynamic movement that encourages flexibility in your spine. Moving between these two positions helps to hydrate your spinal discs, improve posture, and relieve tension in your back muscles. It’s a go-to move in both yoga and physical therapy for a reason.
Begin on your hands and knees in a tabletop position, with your wrists directly under your shoulders and your knees under your hips. As you inhale, drop your belly toward the floor and look up, arching your back into the cow pose. As you exhale, round your spine toward the ceiling, tucking your chin to your chest, for the cat pose. It's important to move smoothly between the two poses, flowing with your breath. Repeat this fluid motion for 10 to 15 repetitions.
The bridge exercise is excellent for strengthening your glutes and hamstrings, the major muscles that support your lower back. When these muscles are strong, they take a lot of the strain off your spine, which is crucial when you’re healing from a slipped disc.
Lie on your back with your knees bent, feet flat on the floor, and arms by your sides. Squeeze your glutes and lift your hips off the floor until your body forms a straight line from your shoulders to your knees. Be careful not to over-arch your back. Hold this position for 5 to 10 seconds, then slowly lower your hips back down to the floor. For a good workout, you can repeat this 10 to 12 times for 2 to 3 sets.
The bird-dog is a fantastic exercise for improving stability in your entire core and lower back without putting stress on your spine. It challenges your balance and coordination, teaching your muscles to work together to keep your spine in a safe, neutral position.
Start on your hands and knees, keeping your back flat. Engage your core by pulling your belly button in toward your spine. Slowly extend one arm straight out in front of you while extending the opposite leg straight back behind you. The goal is to keep your torso as still as possible, avoiding any rocking or dipping. Hold for a few seconds, then gently return to the starting position. Switch sides and repeat. Aim for 10 to 12 repetitions on each side.
This exercise, often called a prone press-up, helps to gently guide the disc material back toward the center of the spine, which can relieve pressure on your nerves. It’s a common and effective exercise recommended in physical therapy for certain types of disc issues.
Lie on your stomach with your hands on the floor under your shoulders, as if you were about to do a push-up. Keeping your hips and pelvis on the floor, gently press up with your arms to lift your chest and upper back. Only go as high as you can without pain. It’s important to let your back relax and sag, rather than using your back muscles to lift yourself. Hold for a moment, then slowly lower yourself back down. Repeat 10 times.
Similar to the press-up, the cobra pose is a gentle backbend that can help centralize disc pain and improve spinal mobility. It strengthens the muscles along your spine and stretches your chest and abs, promoting better posture.
Lie face down on the floor with your palms flat under your shoulders. Keep your legs and the tops of your feet on the floor. Gently push through your hands to lift your head, chest, and shoulders off the floor, keeping a slight bend in your elbows. Keep your hips pressed into the floor and only lift as high as feels comfortable. Hold the pose for 15 to 30 seconds, breathing steadily. Then, release back down to the floor. Repeat 3 to 5 times.
If your slipped disc is causing sciatica, you know the pain that radiates down your leg all too well. The piriformis stretch can be a game-changer for this type of discomfort. Your piriformis is a small muscle located deep in your buttock, and when it gets tight, it can press on the sciatic nerve, mimicking or worsening the pain from a herniated disc. This stretch helps to release that tension and create more space for the nerve. To do this stretch, lie on your back with both knees bent and your feet flat on the floor. Cross the ankle of your affected leg over your opposite knee, creating a "figure four" shape. Gently reach through your legs and grasp the back of your thigh on the supporting leg. Slowly pull it toward your chest until you feel a good stretch in your buttock. Hold for 20 to 30 seconds, breathing deeply, and then switch sides. This can provide significant relief for the sharp, traveling pain associated with sciatica.
You might be surprised to learn how much your hamstrings affect your lower back. These long muscles run down the back of your thighs, and when they're tight, they pull on your pelvis. This can flatten the natural curve of your lower back, increasing the stress on your spinal discs. Keeping your hamstrings flexible is a key part of a healthy back routine, especially when you’re recovering from a herniation. A gentle hamstring stretch can help lengthen these muscles and reduce the strain on your lumbar spine. There are many ways to stretch your hamstrings, but it’s important to choose a method that doesn’t involve rounding your lower back, which could aggravate your disc. One of the safest and most accessible variations is the seated chair hamstring stretch. This modification allows you to maintain good posture while still getting an effective stretch, making it a perfect choice for anyone who finds floor exercises difficult or uncomfortable.
This version of the hamstring stretch is ideal because it supports your back and allows for precise control. Sit on the edge of a sturdy chair with your feet flat on the floor. Extend one leg straight out in front of you, with your heel on the floor and your toes pointing toward the ceiling. Sit up tall, keeping your back straight. From here, slowly lean forward from your hips until you feel a gentle stretch along the back of your outstretched leg. Avoid rounding your back. Hold the stretch for 15 to 30 seconds, then slowly return to the starting position and switch legs. Repeat 2 to 3 times on each side.
So much of our day is spent sitting or hunching forward, which puts constant pressure on the front of our spinal discs. The standing backward bend is a simple extension exercise that helps counteract this forward flexion. By gently arching your back, you encourage the bulging disc material to move away from the spinal nerves and back toward the center of the disc. This movement can provide immediate relief and helps to restore your spine's natural alignment. Stand up straight with your feet shoulder-width apart and place your hands on your lower back for support, with your fingers pointing downward. Gently press your hips forward and bend your upper body backward slightly. Only go as far as feels comfortable—this should be a gentle, relieving movement, not a deep backbend. Hold for 5 to 10 seconds, breathing normally, and then return to a neutral standing position. You can repeat this several times throughout the day, especially after long periods of sitting.
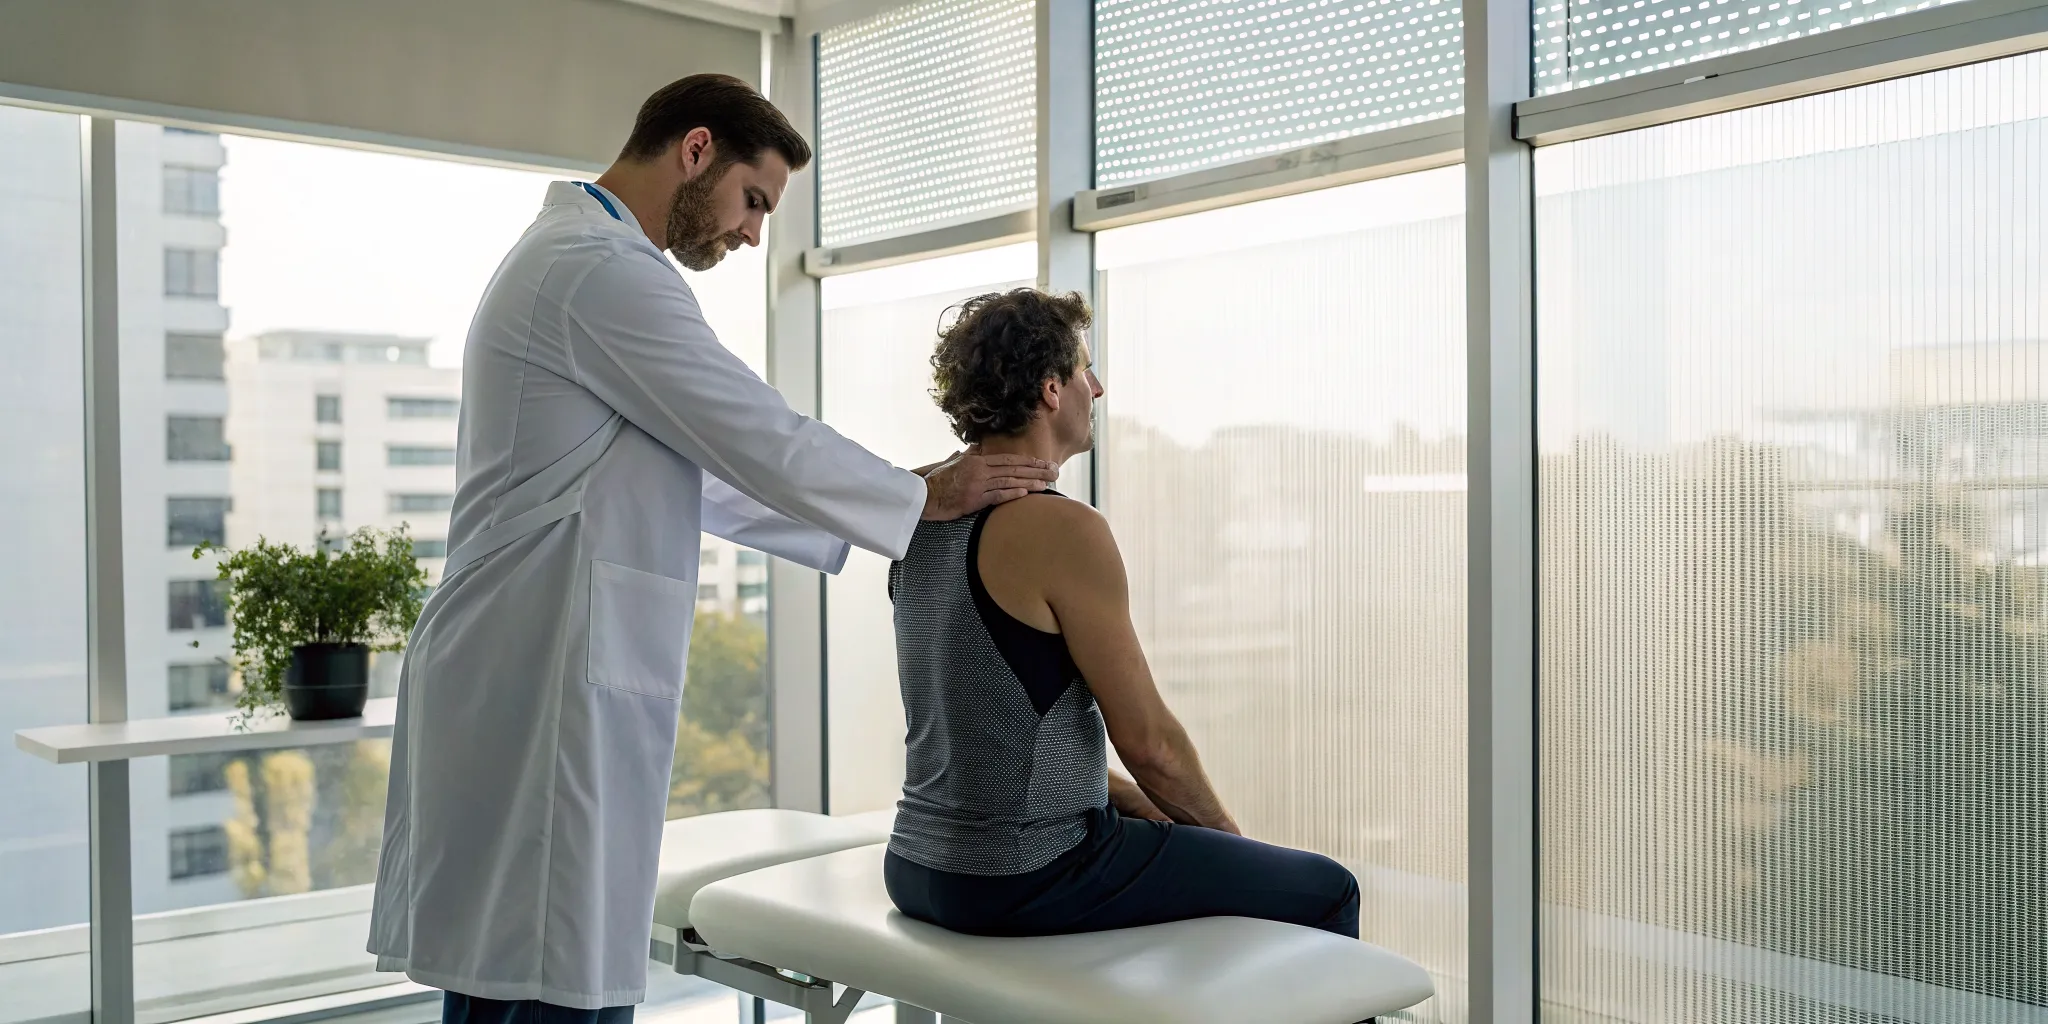
A herniated disc in the neck, or cervical spine, requires a different approach than one in the lower back. The structures in your neck are smaller and more delicate, so the exercises need to be especially gentle and precise. The goal is to relieve pressure on the cervical nerves, which can cause pain that radiates into the shoulder and arm, as well as headaches and stiffness. These movements are designed to improve posture, strengthen the supporting muscles of your neck, and increase flexibility without causing further irritation. When performing these exercises, the key is slow, controlled motion. Never force a stretch or push through sharp pain. These movements should feel relieving and help to reduce tension, not create more.
If you're experiencing symptoms like radiating arm pain, numbness, or persistent neck pain, it's a sign that a nerve is being compressed. Combining these gentle home exercises with professional care can create a comprehensive plan for your recovery. A one-size-fits-all approach rarely works for spinal issues, as the exact location and severity of the herniation can vary greatly. At Lazar Spinal Care, we use advanced diagnostics like PostureIQ™ and neurological scans to get a clear picture of what’s happening in your cervical spine. This allows us to understand the root cause of your neck issues and develop a tailored plan that addresses your specific structural needs, helping you heal effectively and find lasting relief.
The chin tuck is one of the most important exercises for a cervical herniated disc. It helps strengthen the deep muscles in the front of your neck that support your head and correct the forward-head posture that is so common today. By strengthening these muscles, you reduce the strain on your cervical spine and discs. Think of it as pulling your head back into proper alignment over your shoulders. You can do this exercise while sitting or standing. Start by sitting up tall and looking straight ahead. Without tilting your head down, gently draw your head and chin straight back, as if you’re trying to make a double chin. You should feel a stretch at the back of your neck. It's a very subtle movement. Hold this position for about 5 seconds, then relax. Repeat this 10 times. You can do this several times throughout the day to combat the effects of looking down at screens.
When your neck hurts, the tension often spreads to your shoulders and upper back. The muscles in this area can become tight and sore as they try to guard the injured area. Shoulder rolls are a simple and effective way to release this tension, improve blood flow, and increase mobility in your shoulder girdle. This can indirectly relieve some of the strain on your neck. Sit or stand with your back straight and your arms relaxed at your sides. Inhale as you slowly lift your shoulders up toward your ears. Then, exhale as you roll them back and down, squeezing your shoulder blades together gently. Repeat this movement in a slow, circular motion for 5 to 10 repetitions. After you’ve finished rolling them backward, reverse the direction and roll your shoulders forward for another 5 to 10 repetitions. This helps to break up stiffness and promote relaxation in the upper body.
Stiffness is a common symptom of a cervical herniated disc, and gentle neck turns can help restore your range of motion. This exercise carefully stretches the muscles on the sides of your neck, helping to relieve tightness. The key here is to move very slowly and deliberately, staying within a pain-free range. This is not about pushing your limits but about gently encouraging your neck to move more freely again. Sit tall with your shoulders relaxed and down. Slowly turn your head to the right, as if you’re looking over your shoulder, until you feel a light stretch. Stop before you feel any pain or pinching. Hold the stretch for 10 to 20 seconds, then slowly return your head to the center. Repeat on the left side. Perform this stretch 3 to 5 times on each side. If you feel any sharp pain or radiating symptoms, it’s a sign to back off. Understanding your body's signals is crucial, and as a new patient, we can help you learn how to move safely for your specific condition.
When you’re dealing with a slipped disc, knowing which exercises to skip is just as important as knowing which ones to do. The right movements can support your recovery, but the wrong ones can increase pain, put more pressure on the nerve, and delay healing. Think of this as creating a "do not fly" list for your spine while it repairs itself.
Certain activities can jar your spine, strain your lower back, or compress the already-sensitive disc. By steering clear of these movements, you give your body the best possible environment to heal. Let’s walk through the main types of exercises you should put on pause for now.
High-impact exercises involve movements where both of your feet leave the ground at the same time, like running, jumping, or high-intensity interval training. While these are often great for cardiovascular health, the repetitive jarring motion can be too much for a sensitive spine. Activities like jogging, plyometrics, and even some forms of dance can send shockwaves through your body, aggravating the herniated disc and worsening your pain. Instead, opt for low-impact cardio like walking, swimming, or using an elliptical machine to keep your body moving without the stressful impact.
Lifting heavy objects, especially with poor form, is a major risk factor for disc injuries. Avoid any exercises that require you to lift significant weight, such as deadlifts or weighted squats, until you’ve been cleared by a professional. You should also stay away from deep forward bends, like trying to touch your toes. These movements can place a tremendous amount of pressure on your lumbar discs. Twisting your spine, particularly while bending or holding even a small amount of weight, can also worsen the problem. Focus on maintaining a neutral spine in all your movements.
A strong core is essential for back health, but some traditional ab exercises do more harm than good when you have a slipped disc. Traditional sit-ups and crunches, for example, cause you to repeatedly flex your lower back, which can put way too much pressure on your spinal discs. Similarly, exercises that involve extreme twisting, like Russian twists, can irritate the affected nerve and disc. Instead of these, stick to core-stabilizing exercises like the pelvic tilt and bird-dog, which strengthen your abdominal muscles without straining your back. Our specialized chiropractic techniques focus on restoring this kind of foundational stability.
Moving your body is a key part of healing a slipped disc, but doing it the right way is what truly makes a difference. The goal is to strengthen your supporting muscles without aggravating the injury. Think of it as a partnership with your body. By following a few simple rules, you can create a safe and effective routine that supports your recovery and helps you feel more in control of your health. These guidelines will help you build strength, improve mobility, and get back to your life with confidence.
Your body sends you signals, and learning to interpret them is your most important skill when exercising with a slipped disc. It's normal to feel some muscle soreness when you start a new routine, but sharp, stabbing, or increasing pain is a red flag. Pay close attention to how you feel both during and after each exercise. A little discomfort as your muscles work is okay, but if the pain feels worse than when you started, your body is telling you to ease up. This isn't about pushing through the pain; it's about working with your body to heal it.
When you’re recovering from an injury, slow and steady wins the race. Always begin each exercise slowly and deliberately, focusing on maintaining proper form. It’s much better to do five repetitions correctly than 15 with poor technique. Start with just a few reps of each exercise and gradually increase the number over several weeks as you feel stronger and more stable. Rushing the process can lead to setbacks, so give your body the time it needs to adapt and build strength safely. This approach ensures you’re healing, not harming.
Think of your recovery exercises like building blocks. You wouldn't start building a house with the roof; you'd start with a solid foundation. In the beginning, your focus should be on mastering the most basic, gentle movements, like the pelvic tilt or knee-to-chest stretch. Once you can perform these consistently without any increase in pain, you can slowly introduce slightly more challenging exercises, such as the bird-dog or bridge. This gradual progression is crucial because it allows your supporting muscles to get stronger over time, creating that "natural brace" for your spine. By following a structured plan, you’re not just managing symptoms—you’re actively rebuilding a more resilient back and creating a foundation for lasting wellness. This methodical approach is a core part of how we guide patients toward effective, long-term recovery.
Knowing your limits is a sign of strength, not weakness. If you feel your pain getting worse, especially in your leg or buttock, it’s a clear signal to stop immediately. The same goes for any new numbness or weakness. Don’t try to push through it. Most exercises can be modified to be less intense, so you might be able to adjust your position to continue safely. If an exercise consistently causes pain no matter how you modify it, simply remove it from your routine for now. Your recovery is unique, and your workout should reflect that.
When you have a slipped disc, your pain can act like a roadmap, telling you if an exercise is helping or hurting. This is where understanding two key terms comes in handy: centralization and peripheralization. Centralization is a good sign; it means the pain is retreating from your extremities—like your leg or arm—and moving closer to the center of your spine. For example, if your sciatica pain used to shoot down to your foot but now only goes to your knee, that’s centralization in action. It suggests the pressure on the nerve is decreasing. On the other hand, peripheralization is a warning signal. This happens when the pain spreads further down your arm or leg during or after an exercise. If that knee pain starts traveling back down to your foot, your body is telling you that the movement is aggravating the nerve. The goal of your exercise routine is to find movements that encourage centralization. Paying attention to these signals is the most reliable way to ensure you’re promoting healing and not causing more harm to the sensitive nerves affected by conditions like radiating pain.
Pay special attention to any pain that travels from your back down into your buttock or leg. This type of pain, often called sciatica, can feel like a sharp, shooting sensation, a dull ache, or even numbness and tingling. It’s a classic sign that a herniated disc may be compressing a spinal nerve. If you notice this symptom getting worse or spreading further down your leg during an exercise, stop right away. This is a critical warning sign that the movement is irritating the nerve, and it's time to consult a professional to ensure you're on the right path to recovery.
Knowing which exercises to do is one thing, but turning them into a regular habit is what truly drives recovery. A consistent routine helps manage your pain, strengthens your body over time, and prevents future flare-ups. It’s not about pushing through intense workouts every day; it’s about creating a sustainable rhythm of movement and rest that supports your body’s healing process. This structure can make a huge difference in how you feel day-to-day and is a cornerstone of a successful chiropractic care plan.
Building this routine is as much a mental exercise as it is a physical one. When you’re in pain, motivation can be low, and it’s easy to fall into a cycle of inactivity that can make stiffness and discomfort worse. By committing to a gentle, predictable schedule, you regain a sense of control over your health. You start to learn your body’s signals, understanding the difference between the productive ache of a healing muscle and the warning sign of sharp pain. This self-awareness is invaluable.
Think of your exercise routine as a daily conversation with your body. It’s a time to check in, provide gentle encouragement through movement, and listen to its needs. This approach works hand-in-hand with the care you receive at our clinic. While our adjustments address the root structural issues, your daily movements help maintain that alignment, improve circulation to the injured area, and build the supporting muscle strength needed for long-term stability. Consistency is what bridges the gap between your appointments, empowering you to be an active participant in your own healing journey.
The easiest way to stick with your exercises is to make them a non-negotiable part of your day. Pick a time that works for you, whether it’s first thing in the morning or during your lunch break, and put it on your calendar. Remember to start slowly and build up your activity level gradually. You might begin with just 10 minutes a day and add more time as you feel stronger. The goal is to create a habit that feels manageable, not overwhelming. If an exercise causes sharp or increasing pain, it’s a signal to stop and consult with your healthcare provider. This isn't about perfection; it's about showing up for yourself consistently.
While it might be tempting to lie down and wait for the pain to go away, gentle movement is often more beneficial for a slipped disc. In fact, experts suggest that getting up and moving gently is better than prolonged bed rest. However, rest is equally important for healing. Your routine should include both activity and recovery. This might mean alternating exercise days with rest days or following a short exercise session with a period of relaxation. Listen to your body’s cues. If you feel tired or sore, give yourself permission to take a break. True progress comes from this balance, not from pushing through exhaustion.
Keeping a simple log of your activities and symptoms can be incredibly helpful. Note which exercises you did, how you felt during and after, and any changes in your pain levels. It’s important to pay close attention to your pain because it provides valuable feedback. A little muscle soreness might be normal at first, but sharp, shooting, or worsening pain is a sign to back off. This record will not only help you see how far you’ve come but will also provide clear information to share with your chiropractor during your appointments, allowing for a more tailored treatment plan.
Your routine doesn’t have to be limited to the same set of exercises every day. Adding variety with other low-impact activities can keep you motivated and support your recovery. For example, water exercises can be better than other forms of therapy for reducing pain and improving movement, sleep, and mood. The buoyancy of the water supports your spine, allowing you to move more freely with less discomfort. Gentle walking is another excellent option that keeps your body moving without putting stress on your back. Mixing things up keeps your routine fresh and your body engaged in different ways.
Your exercise routine is a powerful tool for healing, but your daily habits are what protect that progress. The small choices you make throughout the day—how you sit, sleep, and lift—can either support your recovery or work against it. By making a few simple adjustments to your lifestyle, you can create an environment where your body can heal more efficiently. Think of these tips as the supporting cast to your main character exercises. They work together to reduce strain on your spine, manage inflammation, and help you feel better, faster. These habits, combined with professional care, create a comprehensive plan for lasting relief.
You spend about a third of your life sleeping, so your posture in bed has a huge impact on your spine. The goal is to keep your spine in a neutral, straight line to minimize stress on your herniated disc. If you’re a side sleeper, placing a pillow between your knees can prevent your top leg from pulling your spine out of alignment. If you prefer sleeping on your back, a pillow under your knees will help maintain the natural curve of your lower back. The one position to avoid is sleeping on your stomach, as it forces your neck to twist and can flatten your spine’s natural curve, adding unnecessary strain while you’re trying to heal.
One wrong lift can set your recovery back, so it’s crucial to relearn this everyday movement. The golden rule is to lift with your legs, not your back. Before you pick something up, get close to the object, plant your feet firmly, and bend at your knees—not your waist. Keep your back straight and your core muscles engaged as you use your powerful leg muscles to stand up. Hold the object close to your body to reduce the lever effect on your spine. Most importantly, never twist your body while lifting. Instead, pivot with your feet. Mastering this technique protects your spine from the kind of strain that can cause or worsen a disc injury.
Becoming a detective of your own pain can help you identify and avoid triggers. Certain activities and habits are known to make herniated disc pain worse. For many people, sitting for long periods, especially with poor posture, can significantly increase discomfort. Be mindful of how you sit at your desk or in the car. Sudden twisting movements, like reaching for something in the back seat, can also cause a flare-up. By recognizing what aggravates your symptoms, you can make conscious choices to modify your movements and protect your back throughout the day. Addressing these factors is a key part of managing many of the conditions we help with at our clinic.
Heat and ice are simple yet effective tools for managing pain and inflammation. They work in different ways, so it’s important to know when to use each one. Ice is your best friend in the first 24 to 48 hours after an injury or during a painful flare-up. Applying an ice pack wrapped in a thin towel for 15-20 minutes helps constrict blood vessels, which can reduce swelling and numb sharp pain. After the initial inflammation has subsided, heat can be very soothing. A heating pad or warm compress helps relax tight muscles and increases blood flow to the area, which promotes healing. Alternating between the two can also provide significant relief.
If your herniated disc is in your neck, your phone or computer could be a major source of aggravation. The habit of looking down at a screen, often called "tech neck," puts a tremendous amount of forward pressure on your cervical spine. To reduce this strain, make a conscious effort to keep screens at eye level. Use a monitor stand for your computer and hold your phone up in front of you instead of resting it in your lap. It’s also helpful to take frequent breaks to stretch and look away from your screen. These small changes can make a big difference in relieving neck pain and giving your cervical discs a chance to heal.
Healing from a slipped disc is a journey, not a sprint. It’s natural to wonder how long it will take to feel like yourself again. While there’s no one-size-fits-all answer, understanding the general recovery process can help you set realistic expectations and stay motivated. Your body has an incredible capacity to heal, but it needs time and the right conditions. Consistency with your exercises, lifestyle adjustments, and professional care is what paves the way for a successful recovery. At Lazar Spinal Care, we focus on addressing the root cause of your issue, which helps create a stable foundation for your body to heal properly and build lasting resilience.
While every person’s experience is unique, many people with a herniated disc see significant improvement within six to eight weeks of consistent, gentle exercise and care. During this time, you may notice a gradual reduction in pain and an increase in your ability to perform daily activities. For many, it can take three to four months to become largely symptom-free. This timeline depends on several factors, including the severity of your disc herniation, your overall health, and how consistently you follow your care plan. The key is patience and persistence. By combining your home efforts with a tailored treatment plan from a professional, you give yourself the best chance at a smooth and effective recovery, starting with your very first visit as a new patient.
While a consistent exercise routine is a powerful tool for managing slipped disc pain, it’s not always enough. Listening to your body includes knowing when to call for backup. If your pain isn’t improving or you’re experiencing certain warning signs, it’s time to seek professional care to get to the root of the problem and find a path toward lasting relief.
Certain symptoms are red flags that require immediate attention. If you experience a loss of reflexes or have trouble controlling your bladder or bowel, you should get medical help right away. You should also stop exercising if your pain gets significantly worse afterward and stays that way into the next day. Pay attention to subtle signs, too. If you notice that coughing, sneezing, or even laughing causes a sharp increase in pain, it could be a sign that the disc is putting pressure on a nerve. These are clear signals from your body that it’s time to see a professional who can properly diagnose the issue and guide your next steps.
Think of your exercise plan and chiropractic care as a team working toward the same goal: your recovery. Exercise is fantastic for strengthening the muscles that support your spine, improving flexibility, and promoting blood flow to the injured area. However, if your spine is misaligned, your exercises might not be as effective, and you could even risk further injury. That’s where we come in. At Lazar Spinal Care, we use a NeuroBioStructural Analysis to find the root cause of your pain. By correcting the underlying structural shifts, we create a stable foundation, allowing your exercises to deliver better results and helping your body heal correctly.
For many people, slipped disc pain improves with conservative care. But when the pain persists, you need more advanced solutions that don’t involve invasive procedures. While surgery is an option for some, it’s often a last resort. We offer several non-invasive therapies designed to accelerate healing and provide lasting relief. Our approach uses gentle, precise Quantum Spinal Mechanics (QSM3) adjustments to restore your body’s alignment. We may also use Laser Therapy to reduce inflammation and pain or Tissue Regenerative Technology to stimulate your body’s natural repair processes at a cellular level. These treatments work together to help you feel better and fix the problem for good.
How soon can I expect to feel better after starting these exercises? Every person's recovery timeline is different, so it's hard to give a specific number of days or weeks. Relief is often gradual. The goal of these exercises is not just immediate pain reduction but also building long-term strength and stability to support your spine. You might notice small improvements in flexibility or a decrease in pain intensity within a couple of weeks if you are consistent. The key is to focus on steady progress rather than a quick fix.
Is walking a good exercise for a slipped disc? Yes, gentle walking is one of the best low-impact activities you can do. It gets your blood flowing, which helps deliver nutrients to the injured area, and it can prevent the stiffness that comes from being too sedentary. Start with short, slow walks on a flat surface and pay attention to your posture. If you feel any sharp or radiating pain, it’s a sign to shorten your walk or take a rest day.
Can a slipped disc heal completely on its own? While the body has an amazing capacity to heal, a herniated disc often points to an underlying structural issue, like a misalignment in your spine. The pain might subside over time, but if the root cause isn't addressed, the problem can easily return or lead to other issues. Getting a professional evaluation is the best way to understand what’s really going on and ensure you’re healing correctly for lasting results.
What should I do if I feel sharp pain while doing one of these exercises? You should stop immediately. Sharp, shooting, or radiating pain (the kind that travels down your arm or leg) is a clear signal that you are irritating the nerve. It’s your body’s way of saying, "This specific movement isn't helping right now." Rest for a bit, and don't try to push through that particular exercise again that day. If the pain continues or happens with multiple movements, it's time to get a professional assessment.
How is chiropractic care different from physical therapy for a slipped disc? Both can be very helpful, but they often focus on different aspects of healing. Physical therapy typically concentrates on strengthening the muscles around the injured area to provide better support. Our approach to chiropractic care at Lazar Spinal Care is different; we focus on identifying and correcting the root structural and neurological shifts in your spine that led to the disc problem in the first place. By restoring proper alignment, we create a stable foundation that allows your body to heal more effectively.
Imagine your body is constantly fighting against gravity. Over time, this can create a pattern of tension that pulls your spine out of alignment, contributing to problems like a slipped disc. Quantum Spinal Mechanics, or QSM3, is a gentle method we use to release this deep-seated tension. It’s not about forceful cracking or twisting. Instead, it involves precise, light touches to specific points on your neck and skull. This process helps your body let go of the strain that’s holding it in a stressed, misaligned position. As your body returns to a more balanced state, it naturally decompresses the spine, taking pressure off the herniated disc and the irritated nerves. At Lazar Spinal Care, QSM3 is a core part of how we help patients find lasting relief by addressing the root of the problem.
To support your body’s healing process even further, we often pair our chiropractic adjustments with other advanced technologies. Think of these as tools that help accelerate your recovery on a cellular level. For instance, Laser Therapy is a painless treatment that uses light energy to reduce inflammation and calm irritated nerves, which can provide significant relief from the acute pain of a slipped disc. It works by stimulating your body's natural healing processes right at the source of the injury. We also utilize Tissue Regenerative Technology (TRT), which helps kickstart your body’s own repair mechanisms to rebuild damaged tissue more effectively. When used together, these therapies create an optimal healing environment, ensuring that the structural corrections we make hold better and your recovery is both faster and more complete.